

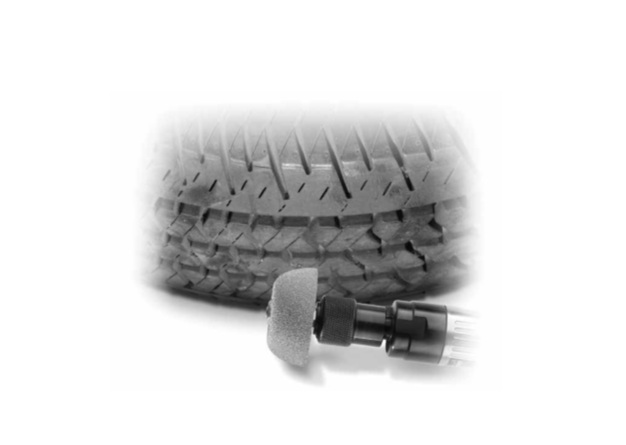
Preparing a damaged tyre for a permissible repair requires controlled surface removal rather than aggressive grinding. Choosing a rubber buffing tool involves matching its shape, cutting texture, shaft size, and operating limits to a specific repair procedure. The objective is to prepare rubber for bonding while avoiding unnecessary removal of structural material. Tool selection is only one step: a technician must first determine whether the tyre is safe and eligible for repair.
Establish Whether a Repair Is Permitted
Before using a rubber buffing tool, remove the tyre from the wheel assembly and inspect the inside and outside for hidden damage, following the applicable repair standard. The U.S. Tire Manufacturers Association recommends that ordinary passenger and light-truck puncture repairs be limited to the tread area and injuries no greater than 6 millimetres in diameter. Damage entering the shoulder or involving compromised structural material may require the tyre to be removed from service.
The repair decision should account for any previous repair, run-flat operation, unusual internal abrasion, or signs that the tyre was driven while significantly underinflated.
This guidance is not interchangeable with procedures for commercial tyre section repairs or retreading. Those operations have different inspection criteria and repair-material instructions. Surface preparation cannot make an otherwise unsafe casing suitable for continued use.
Match Tool Geometry to the Task
A rubber buffing tool can be a contour wheel, rasp, small mounted point, or another cutting profile. The referenced tyre-repair range includes flared contour wheels, round buzzout wheels, small-shaft tools, retreading sidewall wheels, and specialised accessories. These suit different repair zones.
The right geometry should allow a trained technician to treat the intended area evenly without creating an unnecessarily wide or deep cavity. A wheel selected for a broad section may be unsuitable for a narrow puncture preparation. Check the repair-material manufacturer’s requirements and the tool maker’s recommendations before choosing a cutting profile.
Consider Carbide Surface and Speed Limits
Some rubber buffing tool designs use tungsten-carbide cutting structures to remove rubber with controlled abrasion. Tool texture influences the final surface, and an overly aggressive cut can expose cords or change the geometry of the repair area. A smooth-looking surface is not necessarily the correct texture for adhesive bonding.
The USTMA passenger-tyre repair chart specifies low-speed buffing, up to 5,000 revolutions per minute, and a suitable fine texture for that particular procedure. This should not be taken as a universal speed rating for every wheel. Always follow the more restrictive limit stated by the selected tool, equipment, and repair instructions. Do not use unapproved combinations of adapters, shafts, and rotary drivers.
Keep the Bonding Area Clean
A rubber buffing tool creates rubber debris that must be managed before cement or a repair unit is applied. Dust, moisture, oil, and hand contact can contaminate the prepared area. Follow the specified cleaning method; guidance for certain puncture repairs calls for brushing and vacuuming rather than blowing the surface with compressed air, which may introduce contaminants.
Avoid over-buffing in an attempt to remove every visible mark. If body cords become exposed or damaged during a procedure that prohibits this, the casing may have to be rejected. Recheck the injury and prepared surface before proceeding to subsequent steps, and document any unexpected damage.
Control Worker Exposure and Maintain Equipment
Using a rubber buffing tool involves rotating machinery, airborne debris, noise, and possible entanglement hazards. Workstations should have suitable guarding, dust controls, and personal protective equipment chosen through a workplace risk assessment. Operators need training on securing the tyre, maintaining appropriate tool contact, and safely stopping the equipment before changing attachments.
A consistent technique also matters. Excessive pressure may produce heat or uneven removal, so operators should follow prescribed contact methods instead of trying to increase speed by pressing harder.
Inspect wheels for damaged cutting surfaces, loose mounting, and excessive wear. Keep shafts, adapters, and rotary equipment clean and within their specified limits. Replace damaged tools rather than attempting unsafe repairs. Inspection supports consistent surface preparation and helps prevent tool failure.
Conclusion
Successful surface preparation depends on inspection, correct cutting geometry, approved speeds, and strict attention to contamination. The tyre-repair product range described by Oliver Carbide Products Inc. illustrates several tool forms, but their suitability depends on the specific tyre and repair procedure. Technicians should always prioritise the repair standard and manufacturer instructions over convenience. Controlled preparation supports quality only when the underlying tyre remains serviceable.