

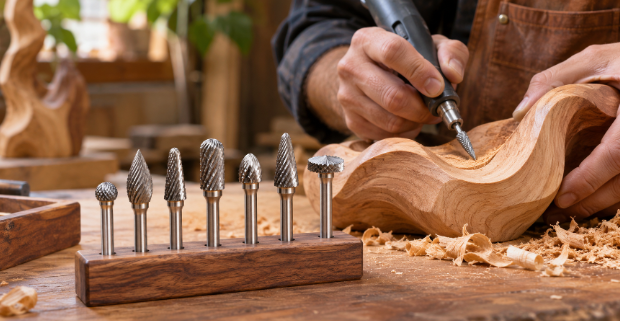
Power carving lets you remove wood quickly, shape curves that are hard by hand, and add texture in minutes. The right bits make the work smooth and controlled, while the wrong ones chatter, clog, or burn. This guide explains how to choose a carbide burr set for carving, from shapes and grit to shaft size and safe use.
What a Carving Burr Is
A rotary burr is a cutting head mounted on a shaft that spins in a rotary tool, die grinder, or flex shaft. Tungsten carbide is a hard material that stays sharp longer than ordinary steel. Carving burrs use carbide teeth or particles on the head to cut wood quickly.
Carving burrs differ from the double-cut carbide burrs sold for metalwork. Wood bits are designed for fast, controlled removal of fibrous material. A carbide burr set meant for carving usually includes several head shapes so you can rough out a form and then refine it.
Match the Shaft to Your Tool
Shaft size is the first filter when shopping for a carbide burr set.
- 1/8 inch shaft: fits small rotary tools and compatible flex shafts
- 1/4 inch shaft: fits die grinders and compatible flex shafts
Shaft size is different from head size. A small shaft can carry a small or medium head, while larger shafts support bigger heads for heavy removal. Match the shaft to your collet or chuck, and check your tool’s rated speed.
Hand drills and drill presses are not recommended for carving burrs. They lack the speed and control the bits require.
Understand the Grades
Burr grades describe how aggressively the teeth remove material.
Fine
Fine grades remove material gradually and can leave a slightly smoother finish. They suit detail work, refining shapes, and final passes.
Coarse
Coarse grades remove material faster as you establish the shape. They are a good starting point for most projects.
Very Coarse
Very coarse grades are the most aggressive. They suit rough shaping and quick removal, and they need light passes as you near the final form.
Pressure also changes results. Lighter pressure and light passes can leave a smoother finish, even with coarse grades. Material and speed matter too.
Common Head Shapes
| Shape | Best for |
| Sphere | Hollowing, dishing, rounding |
| Flame | Flowing contours, relief carving, V-grooves |
| Taper | Details, fine lines, tight spots |
| Ball nose | Smooth hollows and concave curves |
| Rotor saw | Grooves, slicing cuts, rough removal |
A well-planned carbide burr set pairs complementary shapes. A sphere hollows, a flame defines edges, a taper reaches details, and a ball nose smooths concave areas.
Choosing a Set for Your Project
Project type should guide which carbide burr set you buy.
- Small figures and fine detail: fine grades with small heads on a 1/8 inch shaft
- General carving: coarse kits with sphere, flame, taper, and ball-nose shapes
- Large forms and bowls: larger heads on a 1/4 inch shaft
- Mixed work: a variety kit with several shapes and grades
Starting with a variety set helps you learn which shapes and grades you use most. Add individual burrs later.
Safety Basics
Safety is part of using any carbide burr set well.
Power carving removes material fast, and it also creates risks.
- Wear eye protection and a dust mask or respirator
- Secure the workpiece so it cannot spin or slip
- Keep both hands behind the cutting edge
- Let the tool stop completely before setting it down
- Do not use on metals, ceramics, or hard stone
- Keep the burr moving instead of dwelling in one spot
Check your tool’s maximum speed and stay within the bit’s recommended range. Never force a burr through the wood.
Cleaning and Storage
Resin and wood dust can clog the teeth and reduce cutting performance. Clean burrs with a stiff brush, and use a brass or nylon brush instead of steel so you do not damage the teeth. Remove built-up resin with a suitable solvent.
Store burrs in a case or foam holder so heads do not knock together. Dry them before storage to prevent rust on the shaft.
Conclusion
A good choice comes from matching the shaft to your tool, picking grades for the stage of work, and selecting shapes that suit your subject. Hobbyists who enjoy organic wood carving often build their collection gradually, starting with a variety set and adding specialty shapes as skills grow. Practice on scrap, work safely, and enjoy shaping wood with confidence.